GSI

C#을 이용한 FTP로 파일 업로드 하는 코드 입니다.
MSDN에 있는
              ...........
            StreamReader sourceStream = new StreamReader("testfile.txt");
            byte [] fileContents = Encoding.UTF8.GetBytes(sourceStream.ReadToEnd());
             .............
이런 코드를 사용하니까. 인코딩에서 데이터가 제대로 전달되지 못하는 문제가 발생합니다.
그래서 아래와같이 처리 했습니다.

        private void btnFileUploadTest_Click(object sender, EventArgs e)
        {
            Upload("blue.jpg");
            Upload("크기변환_dddd.png");
            Upload("zskin.txt");

            MessageBox.Show("Upload 가 완료되었습니다.");
        }

        private void Upload(string filename)
        {
            FileInfo fileInf = new FileInfo(filename);
            string uri = "ftp://192.168.0.3:8451/" + fileInf;
            FtpWebRequest reqFTP;

            UriBuilder URI = new UriBuilder(uri);
            URI.Scheme = "ftp";

            reqFTP = (FtpWebRequest)FtpWebRequest.Create(URI.Uri);
            reqFTP.Credentials = new NetworkCredential("administrator", "0000");
            reqFTP.KeepAlive = false;
            reqFTP.Method = WebRequestMethods.Ftp.UploadFile;
            reqFTP.UseBinary = true;
            reqFTP.ContentLength = fileInf.Length;
            reqFTP.UsePassive = true;

            int buffLength = 2048;
            byte[] buff = new byte[buffLength];
            int contentLen;

            FileStream fs = fileInf.OpenRead();

            try
            {
                Stream strm = reqFTP.GetRequestStream();
                contentLen = fs.Read(buff, 0, buffLength);

                while (contentLen != 0)
                {
                    strm.Write(buff, 0, contentLen);
                    contentLen = fs.Read(buff, 0, buffLength);
                }

                strm.Close();
                fs.Close();
            }
            catch (Exception ex)
            {
                throw;
            }
        }

Posted by gsi
:


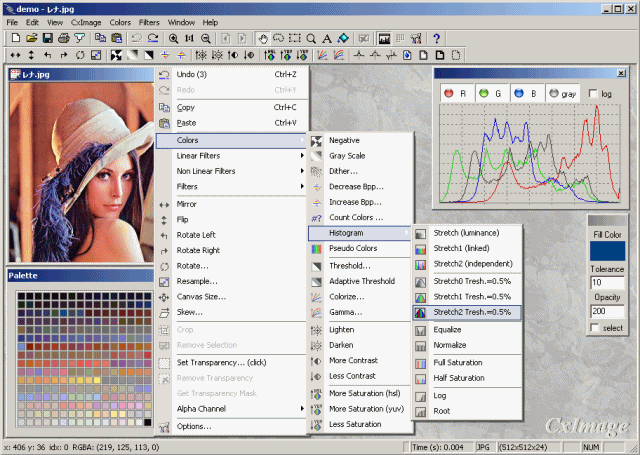
http://www.codeproject.com/KB/graphics/cximage.aspx

CxImage 6.0 Full 코드를 컴파일 해서
png, jpg, bmp, gif 를 지원하도록 처리 해서 생성해 놓은 코드 임.


.
Posted by gsi
:

퍼온글 주소 : http://www.debuglab.com/knowledge/dataencrypt.html

-내용-
dwDataLen = strPassword.GetLength();
CopyMemory(lpData, (LPVOID)(LPCTSTR)strPassword, strPassword.GetLength());

// 암호화
CCrypt Crypt;
Crypt.Create((LPBYTE)(LPCTSTR)strPassword, strPassword.GetLength());
Crypt.Encrypt(lpData, dwDataLen);
Crypt.Destroy();

// 암호화된 데이터 해독
Crypt.Create((LPBYTE)(LPCTSTR)strPassword, strPassword.GetLength());
Crypt.Decrypt(lpData, dwDataLen);
lpData[dwDataLen] = '\0';
::MessageBox(NULL, (LPCTSTR)lpData, "", MB_OK);

소스코드 :


.
Posted by gsi
:

데이터 암호화 방법

1.요약
데이터를 암호화하는 방법에는 여러가지가 있는데 가장 간단한 방법이 배타적 논리합(Exclusive OR)를 이용하는 방법이 있습니다.

이 방법은 너무 간단해서 보안에 치명적이죠. 특별한 암호방법을 고안해낼려면 그쪽 분야에 많은 연구와 노력이 필요한데 저를 포함해 대부분 암호화에 대한 지식이 거의 전무할겁니다.

저같은 사람들을 위해 MS에서 암호화를 위한 API를 제공하고 있습니다.
하지만 이것도 사용하기가 너무 복잡하고 여러 단계를 거져야하는 불편함이 있습니다.

그래서 최대한 사용하기 간단하게 Class로 만들어 보았습니다.


2.본문

먼저 암호에 필요한 API함수는 어떤것이 있는지 알아보겠습니다.
BOOL WINAPI CryptAcquireContext(HCRYPTPROV *phProv, LPCTSTR Container,
                LPCTSTR pszProvider, DWORD dwProvType, DWORD dwFlags);

BOOL WINAPI CryptCreateHash(HCRYPTPROV hProv, ALG_ID Algid,
                CRYPTKEY hKey, DWORD dwFlags, HCRYPTHASH *phHash);

BOOL WINAPI CryptHashData(HCRYPTHASH hHash, BYTE *pbData,
                DWORD dwDataLen, DWORD dwFlags);

BOOL WINAPI CryptDeriveKey(HCRYPTPROV hProv, ALG_ID Algid,
                HCRYPTHASH hBaseData, DWORD dwFlags, HCRYPTKEY *phKey);

BOOL WINAPI CryptEncrypt(HCRYPTKEY hKey, HCRYPTHASH hHash,
                BOOL Final, DWORD dwFlags, BYTE *pbData,
                DWORD *pdwDataLen, DWORD dwBufLen);

BOOL WINAPI CryptDecrypt(HCRYPTKEY hKey, HCRYPTHASH hHash,
                BOOL Final, DWORD dwFlags, BYTE *pbData, DWORD *pdwDataLen);
자세한 사용법은 MSDN을 참고하세요.
이러한 API의 사용법을 설명하지 않겠습니다. 사실 저도 자세히는 모름니다. Class 멤버 함수와 사용법을 소개드리겠습니다.

BOOL CCrypt::Create(LPBYTE pHashData, DWORD dwHashDataLen)
- 암호화나 해독에 필요한 Key를 생성하는 함수. 쉽게 여기에 Password가 들어간다고 생각하면 됩니다.
void CCrypt::Destroy()
- Create에서 만들어진 Handle을 제거합니다.
BOOL CCrypt::Encrypt(LPBYTE lpBuffer, DWORD& dwBufferLen, BOOL bFanal)
- 데이터를 암호화하는 함수
BOOL CCrypt::Decrypt(LPBYTE lpBuffer, DWORD& dwBufferLen, BOOL bFanal)
- 암호화된 데이터를 해독하는 함수

3.예제

dwDataLen = strPassword.GetLength(); 
CopyMemory(lpData, (LPVOID)(LPCTSTR)strPassword, strPassword.GetLength()); 

// 암호화 
CCrypt Crypt; 
Crypt.Create((LPBYTE)(LPCTSTR)strPassword, strPassword.GetLength()); 
Crypt.Encrypt(lpData, dwDataLen); 
Crypt.Destroy(); 

// 암호화된 데이터 해독 
Crypt.Create((LPBYTE)(LPCTSTR)strPassword, strPassword.GetLength()); 
Crypt.Decrypt(lpData, dwDataLen); 
lpData[dwDataLen] = '\0'; 

::MessageBox(NULL, (LPCTSTR)lpData, "", MB_OK);
Crypt.zip 다운로드


- 2001.08.19 Smile Seo -


http://www.debuglab.com/knowledge/dataencrypt.html

Posted by gsi
:

여러개의 객체를 생성하는 코드를 아래와 같이 일반적으로 사용합니다.

class Shape {};
class Line_ : public Shape  { public: Line_()   { printf("create Line\n");  } };
class Polygon_ : public Shape { public: Polygon_()  { printf("create Polygon\n"); } };
class Circle_ : public Shape  { public: Circle_()  { printf("create Circle\n"); } };

namespace DrawingType
{
 const int
  LINE = 1,
  POLYGON = 2,
  CIRCLE = 3;
};


Shape* Load( int drawingType )
{
 Shape* p;

 switch( drawingType )
 {
  using namespace DrawingType;
 case LINE:
  {
   p = new Line_();
  }
  break;

 case POLYGON:
  {
   p = new Polygon_();
  }
  break;

 case CIRCLE:
  {
   p = new Circle_();
  }
  break;
 }

 return p;
}

사용은 아래와 같이
 Shape* p;

 p = Load( DrawingType::LINE );
 delete p;
 p = Load( DrawingType::POLYGON );
 delete p;
 p = Load( DrawingType::CIRCLE );
 delete p;

하지만 이런 코드의 경우 객체의 추가로 인한 오버헤드가 커지게 됩니다.
그럼 이런 경우 어떻게 조금더 최적화가 가능해질것인가를 생각해 보면 아래와 같이 될 수 있습니다.

//
class ShapeFactory
{
 ShapeFactory() {}

public:
 typedef Shape* (*CreateShapeCallback)();

 static ShapeFactory& GetInstance()
 {
  static ShapeFactory sf;
  return sf;
 }

private:
 typedef std::map< int, CreateShapeCallback > CallbackMap;

public:
 bool RegisterShape( int ShapeId, CreateShapeCallback CreateFn )
 {
  return callbacks_.insert(
   CallbackMap::value_type( ShapeId, CreateFn ) ).second;
 }

 bool UnRegisterShape( int ShapeId )
 {
  return callbacks_.erase( ShapeId ) == 1;
 }

 Shape* CreateShape( int ShapeId )
 {
  CallbackMap::const_iterator I = callbacks_.find( ShapeId );
  if( I == callbacks_.end() )
   return NULL;

  return (I->second)();
 }

private:
 CallbackMap callbacks_;
};


namespace
{
 Shape* CreateLine()
 {
  return new Line_;
 }

 Shape* CreatePolygon()
 {
  return new Polygon_;
 }

 Shape* CreateCircle()
 {
  return new Circle_;
 }
 };

// 사용할때

 // 객체 레지스트리에 등록
 ShapeFactory::GetInstance().RegisterShape( DrawingType::LINE, CreateLine );
 ShapeFactory::GetInstance().RegisterShape( DrawingType::POLYGON, CreatePolygon );
 ShapeFactory::GetInstance().RegisterShape( DrawingType::CIRCLE, CreateCircle );

 p = ShapeFactory::GetInstance().CreateShape( DrawingType::LINE );
 delete p;
 p = ShapeFactory::GetInstance().CreateShape( DrawingType::POLYGON );
 delete p;
 p = ShapeFactory::GetInstance().CreateShape( DrawingType::CIRCLE );
 delete p;

객체를 레지스트리에 등록하고
사용하게 됩니다.

이때 더 나아간다면 템플릿을 사용해서 예외 처리를 조금더 기능적으로 해줄 수 있습니다.

Posted by gsi
:

사용자 삽입 이미지

xaml 코드로만 작성해본 폼입니다.

관련코드 :


.
Posted by gsi
:

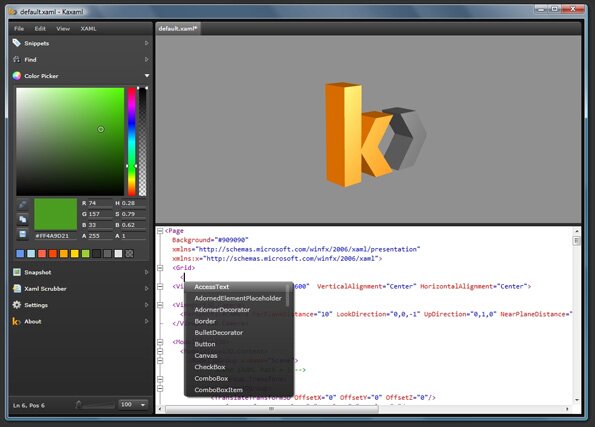
Kaxaml 1.0 Tool

WPF 2008. 6. 1. 10:45 |


http://www.google.co.kr/imgres?imgurl=http://thewpfblog.com/images/yahoo1.jpg&imgrefurl=http://www.snowball.be/CategoryView,category,WPF.aspx&h=473&w=630&sz=261&tbnid=RkGYSUpLU1QJ:&tbnh=103&tbnw=137&prev=/images%3Fq%3Dwpf&hl=ko&sa=X&oi=image_result&resnum=15&ct=image&cd=3

Welcome to Kaxaml!

Kaxaml is a lightweight XAML editor that gives you a "split view" so you can see both your XAML and your rendered content (kind of like XamlPad but without the gigabyte of SDK). Kaxaml is a hobby and was created to be shared, so it's free! Feel free to download and try it out. If you don't like it, it cleans up nicely.

Posted by gsi
:

헤더 파일에 추가하세요.

#ifndef _MEMDC_H_
#define _MEMDC_H_

//////////////////////////////////////////////////
// CMemDC - memory DC
//
// Author: Keith Rule
// Email:  keithr@europa.com
// Copyright 1996-1999, Keith Rule
//
// You may freely use or modify this code provided this
// Copyright is included in all derived versions.
//
// History - 10/3/97 Fixed scrolling bug.
//                   Added print support. - KR
//
//           11/3/99 Fixed most common complaint. Added
//                   background color fill. - KR
//
//           11/3/99 Added support for mapping modes other than
//                   MM_TEXT as suggested by Lee Sang Hun. - KR
//
// This class implements a memory Device Context which allows
// flicker free drawing.

class CMemDC : public CDC {
protected:
 CBitmap  m_bitmap;       // Offscreen bitmap
 CBitmap* m_oldBitmap;    // bitmap originally found in CMemDC
 CDC*     m_pDC;          // Saves CDC passed in constructor
 CRect    m_rect;         // Rectangle of drawing area.
 BOOL     m_bMemDC;       // TRUE if CDC really is a Memory DC.

 void Construct(CDC* pDC)
 {
  ASSERT(pDC != NULL);

  // Some initialization
  m_pDC = pDC;
  m_oldBitmap = NULL;
  m_bMemDC = !pDC->IsPrinting();

  if (m_bMemDC) {
   // Create a Memory DC
   CreateCompatibleDC(pDC);
   pDC->LPtoDP(&m_rect);

   m_bitmap.CreateCompatibleBitmap(pDC, m_rect.Width(), m_rect.Height());
   m_oldBitmap = SelectObject(&m_bitmap);

   SetMapMode(pDC->GetMapMode());
   pDC->DPtoLP(&m_rect);
   SetWindowOrg(m_rect.left, m_rect.top);
  } else {
   // Make a copy of the relevent parts of the current DC for printing
   m_bPrinting = pDC->m_bPrinting;
   m_hDC       = pDC->m_hDC;
   m_hAttribDC = pDC->m_hAttribDC;
  }

  // Fill background
  FillSolidRect(m_rect, pDC->GetBkColor());
 }

 // TRK begin
public:
 CMemDC(CDC* pDC                  ) : CDC() { pDC->GetClipBox(&m_rect); Construct(pDC); }
 CMemDC(CDC* pDC, const RECT& rect) : CDC() { m_rect = rect           ; Construct(pDC); }
 // TRK end

 virtual ~CMemDC()
 {       
  if (m_bMemDC) {
   // Copy the offscreen bitmap onto the screen.
   m_pDC->BitBlt(m_rect.left, m_rect.top, m_rect.Width(), m_rect.Height(),
    this, m_rect.left, m_rect.top, SRCCOPY);           

   //Swap back the original bitmap.
   SelectObject(m_oldBitmap);       
  } else {
   // All we need to do is replace the DC with an illegal value,
   // this keeps us from accidently deleting the handles associated with
   // the CDC that was passed to the constructor.           
   m_hDC = m_hAttribDC = NULL;
  }   
 }

 // Allow usage as a pointer   
 CMemDC* operator->()
 {
  return this;
 }   

 // Allow usage as a pointer   
 operator CMemDC*()
 {
  return this;
 }
};


#endif

Posted by gsi
:

헤더 선언 및 라이브러리 추가

#include <gdiplus.h>
using namespace Gdiplus;
#pragma comment(lib, "gdiplus.lib")

GDI+ 초기화
 // Initialize GDI+.
 GdiplusStartup(&gdiplusToken, &gdiplusStartupInput, NULL);

GDI+ 객체 삭제
 GdiplusShutdown(gdiplusToken);

Posted by gsi
:

void CGDITestView::OnLButtonDown(UINT nFlags, CPoint point)
{
 SetCapture();

 m_oldPoint = point;

 CView::OnLButtonDown(nFlags, point);
}

void CGDITestView::OnLButtonUp(UINT nFlags, CPoint point)
{
 ReleaseCapture();

 CView::OnLButtonUp(nFlags, point);
}

void CGDITestView::OnMouseMove(UINT nFlags, CPoint point)
{
 if( GetCapture() == this )
 {
  m_realPos += (point - m_oldPoint);
  m_oldPoint = point;

  Invalidate();
 }

 CView::OnMouseMove(nFlags, point);
}

Posted by gsi
:


참.. 이 영화로 이렇게 까지 싱크를 맞춰서 제작했다니.. 놀랍네요.. ^^
Posted by gsi
:

[C++] 타일 만들기..

C++ 2008. 5. 15. 02:04 |

데모로 만들어 보고 있는 타일 생성기 초안입니다.

타일을 하나하나 마우스로 찍어서 하는건 너무 노가다라고 생각 되고,
스타 크래프트의 맵 에디터는 신의 경지고 ^^..

우선 아래와 같은 실행 파일을 하나 제작해 봤습니다.
사용자 삽입 이미지

기본 토대는 여러가지의 카테고리를 가진 기본 타일이 존재 하고 그 타일의 주변을 감싸는 테두리를 검색한 후에 그 검색한 테두리 부분을 부드럽게 연결해 주는 겁니다.

관련코드 :


.
Posted by gsi
:

중재자 ( Mediator )

의도

  • 한 집합에 속해 있는 객체의 상호작용을 캡슐화
  • 객체 사이의 소결합 (loose coupling)
  • 객체의 상호작용을 독립적으로 다양화 시킴

동기

  • 객체 지향 개발 방법에 있어서 행동을 여러개의 객체로 분산시키고 있습니다.
  • 분할된 객체들의 관리가 제대로 되지 못하면 객체 간 상호작용의 급증으로 인한 오류를 범할 수 있습니다.

MFC의 개발을 하다 보면 화면 UI 및 데이터간의 연동이 필요 하게 됩니다.
리스트 박스의 셀렉트가 되면 해당 에디터 박스에 출력을 하고, 그 반대의 경우도 존재 할 수 있습니다.
이러한 경우 객체 대 객체 간의 데이터 접근 방법을 사용하게 되면 결합도가 높아지면서 코드가 복잡해 지고,
재 사용성을 떨어 트리게 됩니다.

이때, 중재자 객체를 활용하면 여러 객체가 처리 하는 행동들을 하나의 객체에서 처리 하게 되면서 이런 문제점들을 해결할 수 있습니다.

중재자 객체는 객체 그룹 간의 상호작용을 제어하고 조화를 이루는 역활을 합니다.
즉, 객체 사이의 연결 정도가 줄어 들게 됩니다.

하나의 예를 들어 보겠습니다.
리스트 박스와 에디터 박스가 있다고 합시다.

  1. 리스트 상자는 지시자 객체에게 자신이 변경되었음을 통보 합니다.
  2. 지시자는 리스트 상자에서 선택된 부분이 무엇인지 알아옵니다.
  3. 지시자는 입력 창에 선택 부분을 전달합니다.
  4. 입력 창에는 어떤 값이 포함됩니다. 지시자는 관련된 버튼을 활성화 시킵니다.

UML 내용을 한번 볼께요.

사용자 삽입 이미지

위의 것은 실제적인 구현한 내용을 토대로 제작된 UML 과 아래의 기본 구조모양의 UML을 보실 수 있습니다.

자세한 소스 코드는 오늘은 올리기 힘들듯 합니다. -.-
한번 데모로 작성해 보고 올려야 할듯 합니다.
Posted by gsi
:

template< class T1, class T2 >
class Test
{
};

이런 클래스가 있다고 합시다.
우리는 이 클래스가 두개의 템플릿 인자를 받아 들인다는 걸 알고 있습니다.

Test< Ca, Cb > A;
A a;

이런 식이 되는 거죠.

그렇다면 저희가 작업 할때 Test 라는 템플릿 클래스를 놓고 특정 타입에 대해서
특화 되게 구현하고 싶은 경우가 있을거예요.

template< class T1, class T2 >
class Test {};

template <>
class Test< CT, CU > {};

이렇게 두개의 같은 클래스이지만 하나는 CT, CU의 명시적으로 특화된 클래스가 또 하나 존재를 하게 되면 만약 코딩을 통해서 CT, CU가 들어 오게 되면 아래의 클래스가 동작 되게 되는거죠.

바로 이게 부분 특화 입니다.

이때 부분적으로 특화를 하고 싶다면 아래와 같은 클래스를 하나 추가 하면 되요

template < class T1 >
class Test< T1, CU > {};

앞의 T1은 모든 객체를 다 받아 들이고 뒤의 CU는 명시적으로 선언을 해놨어요.
이게 바로 부분 특화라는 거죠 ^^

하나더 해볼까요?.

Button 이라는 클래스가 있다고 합시다. 모든 Button과 CU에 대해서 특화 시키고자 한다면...

template < class T1 >
class Test< Button<T1>, CU > {};

이렇게 하면 되죠 ^^

템플릿의 장점은 참 많네요..

ps. 지적 및 조언 및 질문 해주시면 고맙겠습니다.

Posted by gsi
:

제목이 참 아리송 합니다. ^^
하지만 내용을 읽고 나면 이해가 될거예요..

이전의 포스트 를 우선 보시고 이 내용을 꼭 보셔야 합니다.

우선 이전의 내용을 한번 짚어 보면...

단위 전략을 통해서 객체 생성에 new, malloc를 선택적으로 해줄 수 있다는 거죠.

typedef WidgetManager< OpNewCreator<CTest> > MyWidgetMgr;
MyWidgetMgr a;

이런 코드를 사용해서 CTest를 특화 되게 구현할 수 있게 되는거죠.
즉, CTest 의 객체를 new, malloc를 선택해서 처리가 가능하다는 말이 됩니다.

그런데 이때 고민이 좀 됩니다.
뭐냐 하면 내부에서

CTest* p = CreationPolicy().Create( p2 );

이 코드를 사용했어요. CTest 를 특화 했기 때문에 CTest만을 사용하게 되는거예요.

난 다른 객체들도 메니져 안에서 다 관리 해주고 할려고 하면 에러가 나서 안되는거죠.

그래서 이 포스트의 주제가 나옵니다.
기본 선언은 비슷하게 구현하되 내부에서 다른 객체를 생성하는 것도 가능하게 말이죠.

우선 아래의 코드를 한번 보고 해요.

template < class T >
struct OpNewCreator
... 생략

template < class T >
struct MallocCreator
... 생략

template < template < class > class CP >
class CTestMgr : public CP<CTest>
{
public:
 CTestMgr()
 {
  CTest2* ptest2 = CP<CTest2>().Create();
 }
 ~CTestMgr() {}
};


위의 코드를 보면 이런 코드가 보입니다.
template < template < class > class CP >
이게 바로 템플릿 템플릿 인자를 통한 단위전략의 중요한 부분이라고 보여 집니다.

즉 이렇게 해서 CP<CTest> 라고 명시적으로 적어 주게 되면 아래와 같은 코드를 통해서 메니져를
처리할 수 있습니다.

typedef CTestMgr< OpNewCreator > MyTestMgr;

원래는 OpNewCreator 에 다른 인자를 더 넣어 주어야 하지만 명시적으로 처리가 되었기 때문에
추가를 해줄 필요가 없게 됩니다.

이렇게 하고 나면...

바로 아래와 같이 내부에서 다른 객체를 사용할 수 있게 됩니다.

CTest2* ptest2 = CP<CTest2>().Create();

어때요?.. CP의 단위 전략을 사용하면서 내가 원하는 다른 객체를 적용할 수 가 있게 됩니다.

Tip.
여기서 보시면 CP에 CTestMgr를 연결할 수도 있게 되요.
CTestMgr* p = CP<CTestMgr>().Create(); 이렇게요.

이건 나중에 템플릿을 여러개로 사용하면서 현재 클래스를 체크를 해준다거나 하는
여러가지 기능을 처리 하는 부분에서 또 설명이 나오네요..

오늘 내용은 여기 까지 ^^

ps. 지적 및 조언 및 질문 해주시면 고맙겠습니다.

Posted by gsi
: